Make a Pie Crust Shield Protector
To Prevent Edges of Pie from Burning
Or Becoming Too Dark
Here is how to make an easy Pie Crust Shield Protector to prevent pie crust edges from burning or getting too dark.
Is is so disappointing to make a pie, or purchase a ready-made pie, pop it into the oven to bake, only to discover that, before the fruit is even tender, the pie crust edges have become too dark and in some cases, have already burned.
This used to happen to me so many times, until I found and purchased pie crust shields.
Now I never need to worry about burnt, or over-baked pie crust edges again.
*FTC Disclosure: As an Amazon Associate I earn from qualifying purchases with no extra cost to you
*FTC Disclosure: As an Amazon Associate I earn from qualifying
purchases with no extra cost to you
If you bake pies often, I highly recommend you purchase a pie crust shield, you will be very happy you did!
GO to The Pie Crust Shield
If you do not have a pie crust shield on hand, no worries, you can easily and quickly make your own!
Here follow simple instructions with photos to make your own pie crust protector using aluminum foil paper.
If necessary you can easily adjust the size of the homemade pie edge protector according to the size of the pie plate/dish.
Step #1
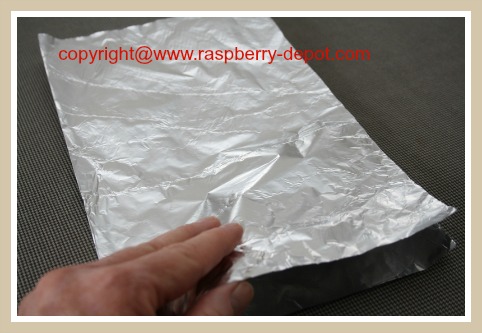
Tear off a piece of aluminum foil paper about 12" long.
Step #2
Fold the piece of foil in half.
Step #3
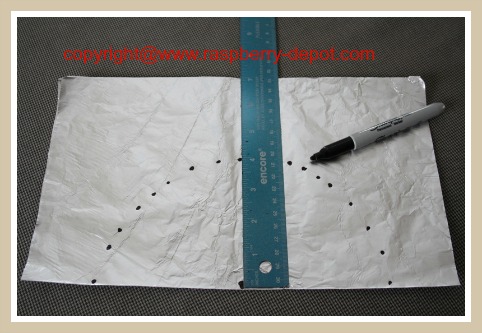
Mark the center.
Step #4
Using a ruler, mark a series of dots about 4" from the center mark.
Step #5
Connect the series of dots to make a half-circle.
Step #6
Cut out the half-circle, just inside the half-circle line.
Step #7
Unfold the foil and place it over the pie plate/dish you will be using to bake your pie (or the pie if you have purchased a ready-to-bake pie). Place it shiny side up so that the heat will deflect away from the pie edges.
Trim edges of shield as necessary.
Step #8
Fold the sides of the pie pastry shield down slightly to a position perpendicular to the kitchen counter (not tight around the edges of the pie plate/pie because the shield needs to be easily slid over the pie while it is baking in the oven).
★ These Pie Crust Shields make great gifts too!
The protector rings are available in a few different sizes, and there is the option of purchasing a shield which is adjustable to fit various sizes of pies.
These are available for online purchase at *Amazon.com.
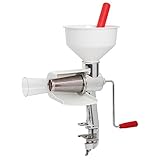
Click on the images below for more detailed product information, and customer reviews.
When should you apply the pie shield to the pie?
I usually suggest to apply the shield to the pie after is has baked for about 30 - 40 minutes, but this will vary according to the type of pie dough and the fruit being baked inside.
Keep an eye on the pie as it is baking, and when the edges of the pie are golden, add the foil protector to the pie.
You may be able to use the homemade pie shield over again for another pie(s).
TOP of How to Make a Pie Crust Shield Protector
RETURN to Raspberry Depot's Tips and How Tos
HOME to Homepage
©2010-2025 Raspberry-depot.com - All Rights Reserved Worldwide
No Reproduction Permitted Without
the Express Written Consent of the Site Owner
Special Occasion Recipes
♥ Valentine Recipes ♥
Pancake Day Recipes
Easter Recipes
Mother's Day Recipes
Father's Day Recipes
Thanksgiving Recipes
Christmas Recipes
New Year's Eve Recipes

This Knife Sharpener
is one of the
Most USEFUL
Kitchen
Tools
that I have
EVER
Purchased
I've been using
the same
Knife Sharpener as
the One Below for
Well Over 10 Years!
⇩


